
10 Simple Car Maintenance Tasks That Will Save You Thousands
For most people, a personal vehicle represents the second-largest financial investment they will ever make. Yet, while drivers rely on their cars daily, few maintain a proactive routine for vehicle care. Modern automobiles operate under extreme heat, friction, and environmental stress. Without consistent preventative care, minor issues—such as a slow fluid drop, improperly inflated tires, or a dirty air filter—silently compound over time into major mechanical failures.
Roughly 80% of essential auto care consists of simple visual inspections, quick fluid top-offs, basic cleaning, and knowing when to service wearable parts. Developing these straightforward habits allows you to extend your car’s lifespan, optimize fuel efficiency, and protect its resale value.
Task 1: Check and Maintain Correct Tire Inflation & Tread Depth
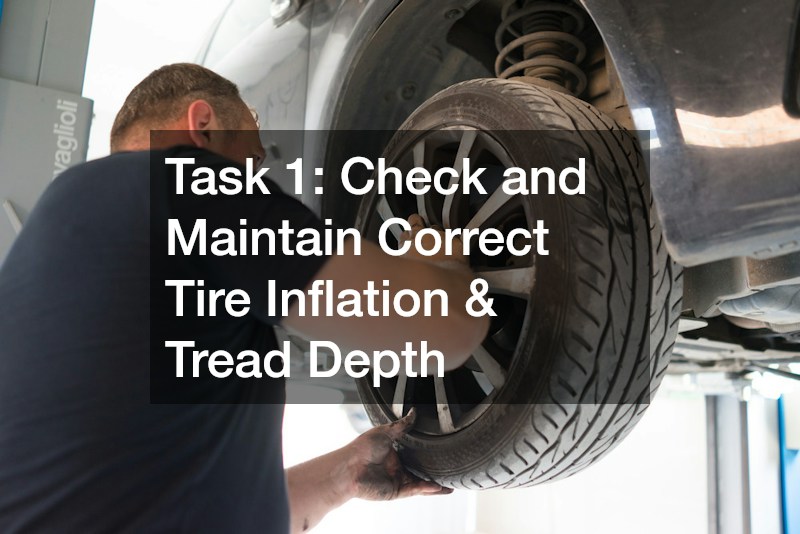
Your tires are the sole point of contact between your vehicle and the road. Despite their foundational role in steering, stopping, and handling, tires are frequently ignored until a flat or blowout occurs.
Optimize Fuel Economy and Prevent Premature Wear
When tires are underinflated, their contact patch expands, creating rolling resistance that forces your engine to consume more fuel.
- Check Pressure Monthly: Use a digital tire pressure gauge to check all four tires—plus your spare—monthly when tires are cold.
- Follow the Door Jamb Sticker: Never inflate tires to the maximum PSI printed on the tire sidewall. Read the manufacturer’s placard located on the driver’s side door jamb instead.
- Monitor Tread Depth: Perform the penny test every few months. Insert an upside-down penny into the tread grooves. If you can see the top of Lincoln’s head, replace the tires immediately.
Prevent Roadside Hazards and Blowouts
Underinflated tires generate intense internal heat that can lead to sudden blowouts. Overinflated tires wear out rapidly along the center while offering significantly less traction during sudden braking. Regular tire checks allow you to spot uneven wear early, pointing to bad alignment or worn suspension bushings before an entire set of tires is ruined. Should a sudden blowout occur in an unsafe area, calling a reliable local towing service ensures your vehicle is safely transported without suffering additional rim or axle damage.
Task 2: Regularly Replace Engine Oil and Oil Filters
Motor oil is your engine’s lifeblood. It lubricates internal metal components, minimizes friction, absorbs combustion heat, and sweeps away microscopic debris.
Maintain Lubrication to Prevent Friction
As motor oil ages under heat cycles, its protective additives break down into a thick sludge that clogs internal passages, leaving internal bearings, pistons, and camshafts grinding against one another.
- Check the Dipstick Regularly: Pull out the dipstick every two weeks. Wipe it clean, reinsert it completely, and verify the oil level rests between the “Full” and “Add” marks.
- Know Your Oil Type: Determine whether your engine requires conventional, synthetic-blend, or full synthetic oil based on your owner’s manual.
- Adhere to Driving Conditions: Frequent short trips under five miles, heavy towing, or dense stop-and-go driving degrade oil faster, requiring more frequent changes.
Safeguard the Heart of Your Vehicle
Replacing the oil filter during every oil change is non-negotiable. A clogged filter triggers an internal bypass valve, allowing dirty, unfiltered oil to circulate back into critical bearing surfaces. Running an engine on low or dirty oil leads to warped cylinder heads, spun bearings, and complete internal engine seizure, resulting in a catastrophic engine repair bill that often forces owners to scrap an otherwise functional car.
Task 3: Inspect and Refresh Cabin and Engine Air Filters
Your vehicle relies on two primary air filters: one that purifies air entering the combustion chambers, and another that cleans air flowing into the passenger cabin. Both can be replaced at home in under ten minutes.
Protect Engine Performance
Internal combustion engines require a precise air-to-fuel ratio to run efficiently. The engine air filter traps dirt, dust, and debris before they can enter the intake manifold and score cylinder walls.
- Visual Inspection: Unclip the air filter housing every 12,000 miles. Hold the filter up to a light source. If it blocks light completely, install a fresh filter.
- Fuel Economy Gains: A clogged filter restricts intake airflow, forcing the engine control computer to adjust fuel timing, which results in sluggish acceleration and reduced fuel economy.
- Easy DIY Savings: Replacing an engine air filter requires zero specialized tools on most vehicles, costing a fraction of commercial shop rates.
Maintain Indoor Air Quality
The cabin air filter, usually located behind the glove box, purifies the outside air pulled into your climate control systems. Over time, it becomes clogged with pollen, dust, and road grit. A restricted filter cuts airflow from dashboard vents, forcing the HVAC blower motor to work harder. Replacing this filter annually keeps your interior air clean, prevents odors, and clears foggy windows quickly in winter.
Task 4: Monitor and Top Off Essential Vehicle Fluids
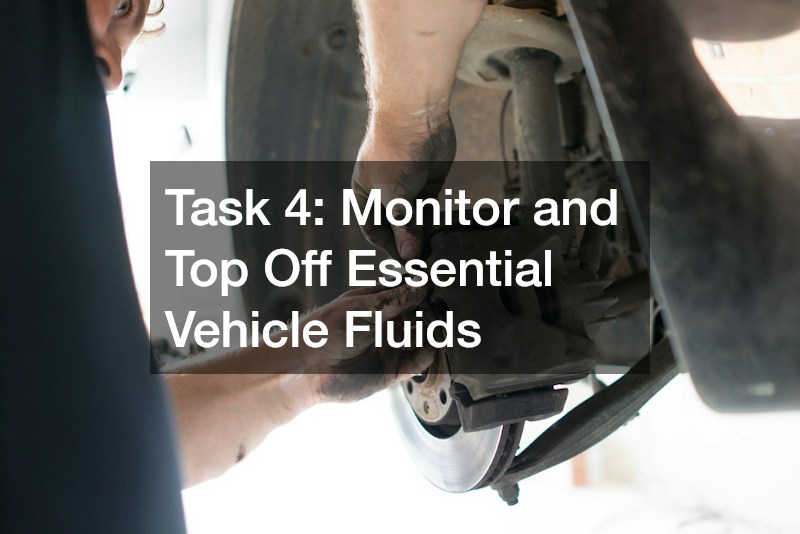
Modern cars depend on a network of specialized fluids to manage operating temperatures, execute gear shifts, assist power steering, and bring heavy machinery to a safe stop.
Audit Coolant, Transmission, and Power Steering Reservoirs
Checking fluid levels takes five minutes monthly. Most reservoirs under the hood feature translucent plastic with molded fill lines to indicate minimum and maximum capacity.
- Engine Coolant (Antifreeze): Coolant regulates engine operating temperature. Never open the radiator cap when the engine is hot. Top off low levels using the exact coolant blend specified by your manufacturer.
- Transmission Fluid: Transmission fluid lubricates and provides hydraulic pressure for gear shifts. Check levels with the engine warm and idling. Dark brown or burnt-smelling fluid signals serious thermal breakdown.
- Power Steering Fluid: Hydraulic power steering relies on fluid pressure to assist turns. Low fluid causes a loud whining noise when turning and eventually burns out the power steering pump.
Keep Hydraulics and Washer Systems Functional
Brake fluid naturally absorbs moisture from the atmosphere over time, lowering its boiling point and leading to a dangerous, spongy pedal feel during hard braking. Inspect the brake fluid reservoir monthly to ensure the fluid remains clear and filled. Inspecting these reservoirs regularly prevents minor drops from turning into major breakdowns that require an expensive visit to an auto repair shop. Keep windshield washer fluid full using seasonal de-icing formulas in winter to ensure clear visibility.
Task 5: Inspect Brake Pads and Rotors for Early Wear
Your vehicle’s braking system is its most vital active safety feature. Disc brakes function via hydraulic pressure forcing friction pads against smooth metal rotors. Because friction material wears away with every stop, routine inspections are essential.
Listen for Friction Signs and Test Responsiveness
Braking components provide clear advance warnings before total failure occurs:
- Listen for Wear Indicators: Tiny metal tabs on brake pads scrape against the metal rotor when material wears down, producing a loud squealing noise during braking.
- Feel for Pulsations: A pulsing brake pedal when slowing down from highway speeds indicates that your brake rotors have developed uneven thickness or surface warping from excessive heat.
- Check Friction Thickness: Inspect the outer pad through your wheel spokes using a flashlight. If friction material measures less than a quarter-inch thick, schedule a pad replacement soon.
Act Early to Avoid Secondary Damage
Getting brake repair services such as replacing worn brake pads is an affordable maintenance task. However, if you drive until the friction layer is completely worn down, the bare steel backing plate will grind directly into the metal rotor. This metal-on-metal contact gouges deep grooves into the rotor surface and generates extreme friction heat that destroys hydraulic caliper pistons, turning a quick pad swap into an expensive overhaul.
Task 6: Protect Your Car’s Exterior Paint and Glass Integrity
A vehicle’s exterior finish serves as a protective shield that prevents moisture, road salts, and atmospheric chemicals from rusting structural steel panels underneath.
Establish a Washing and Waxing Schedule
Road grime, bird droppings, tree sap, and winter de-icing salts are highly corrosive. Left on your vehicle, they slowly strip away the clear coat finish and initiate rust.
- Wash Bi-Weekly: Wash your vehicle every two weeks using dedicated car-wash soap and microfiber mitts. Avoid harsh household dish soaps, which strip protective wax coatings.
- Apply Wax Twice Yearly: Apply a synthetic sealant or carnauba wax in late spring and late fall. Wax creates a hydrophobic barrier that repels water, blocks UV rays, and prevents contaminants from bonding.
- Preserve Resale Value: Vehicles with peeling clear coats and rusted panels lose thousands of dollars in market value.
Address Glass Chip Damage Immediately
Small stones kicked up by highway traffic frequently leave chips or star fractures on your windshield. Rapid temperature changes—such as turning on your defroster on a freezing morning—can cause a tiny chip to instantly crack across the entire windshield. Catching chips early allows them to be sealed with resin quickly and affordably. If a crack spreads, you will need specialized auto glass services to replace the panel and recalibrate safety sensors.
Task 7: Clean and Inspect the Battery and Charging System
Few automotive failures are as frustrating as turning the ignition key on a cold morning and hearing a faint clicking noise. While car batteries have a finite lifespan—typically three to five years—routine care ensures maximum service life.
Remove Corrosion from Terminals
As lead-acid batteries charge and discharge, corrosive hydrogen gas vents near the terminal posts, forming a crusty white, blue, or greenish powder across connection points.
- Disconnect Safely: Always disconnect the negative cable first, followed by the positive cable to eliminate short-circuit risks.
- Clean the Terminals: Mix two tablespoons of baking soda with warm water. Scrub away terminal corrosion using a wire battery brush. Rinse thoroughly with clean water and dry.
- Protect the Connection: Reinstall cable clamps—positive first, negative last—and apply a thin layer of dielectric grease to seal out moisture.
Test Voltage Output and Inspect Hold-Down Clamps
Vibration is a silent battery killer. Check that the metal hold-down bracket securing the battery in its tray is tight to prevent internal plate damage.
Additionally, use an inexpensive digital multimeter to monitor battery health. With the engine off, place the probes on the battery terminals. A healthy, fully charged battery should read approximately 12.6 volts. If the reading drops below 12.2 volts, the battery holds only a partial charge and should be trickle-charged or tested.
Task 8: Preserve Interior Upholstery and Seal Gaps
While mechanical hardware powers the vehicle, you spend all your time inside the cabin. Maintaining interior materials keeps the car comfortable, prevents sour odors, and preserves long-term value.
Protect Cabin Surfaces from Solar Heat and UV Damage
Sunlight passing through automotive glass creates an intense greenhouse effect, driving summer cabin temperatures past 140°F. Direct ultraviolet radiation bakes vinyl dashboards, dries out leather upholstery, and fades fabric seats.
- Use Windshield Sunshades: Always place a reflective accordion sunshade behind the windshield when parking outdoors to drop interior temperatures and prevent dashboard cracking.
- Condition Leather and Vinyl: Clean plastic, vinyl, and leather quarterly using UV-blocking interior cleaners. Some car detailing services apply a quality leather conditioner to keep seats soft and prevent seam cracking.
- Block Heat with Window Films: Utilizing professional auto glass tinting services rejects solar heat and blocks up to 99% of damaging UV rays, protecting interior materials while reducing air conditioning loads.
Maintain Door Seals and Lock Hardware
The rubber weatherstripping surrounding door frames seals out wind noise, water, and drafts. Over time, rubber seals dry out and stick to metal frames, causing weatherstripping to tear when doors are opened in freezing weather. Wipe down rubber seals twice a year with silicone spray applied to a rag to keep them soft. Additionally, apply a squirt of dry graphite lubricant into keyholes and door latches to maintain smooth mechanical operation. Car locksmiths can help with other lock issues.
Task 9: Inspect Belts and Hoses for Cracks or Leaks
Rubber components under the hood operate in a punishing environment. Exposed to extreme engine heat, oil vapors, and mechanical tension, serpentine belts and cooling system hoses degrade over time.
Check Serpentine Belts for Fraying and Tension
The serpentine belt is powered by the crankshaft pulley and drives critical engine accessories, including the alternator, water pump, power steering pump, and air conditioning compressor.
- Inspect the Belt Surface: With the engine off, examine the flat backing and ribbed underside of the belt. Look for hairline cracks across the ribs, missing chunks of rubber, or fraying along the edges.
- Check Belt Tension: Press down firmly on the longest span of the belt; it should yield slightly while remaining taut. If the belt slips or squeals loudly during acceleration, the automatic tensioner pulley may require replacement.
- Prevent Sudden Failure: If a serpentine belt snaps while driving, your alternator stops charging, power steering assist cuts out, and the water pump ceases circulating coolant, causing immediate engine overheating. Replace drive belts every 60,000 to 90,000 miles.
Audit Radiator and Heater Hoses
Coolant hoses endure high internal fluid pressure and extreme temperature swings. As rubber degrades from the inside out, hose walls weaken and become vulnerable to sudden ruptures.
Once the engine cools down completely, squeeze the main radiator hoses with your hand. A healthy hose feels firm yet flexible. If a hose feels spongy, soft, or sticky—or rock-hard and brittle—it is approaching failure and should be replaced promptly before a sudden blowout leaves you stranded.
Task 10: Perform Seasonal Inspections and Undercarriage Checks

As seasons change, your vehicle faces shifting environmental stresses. Preparing your car for weather transitions catches subtle mechanical issues before severe temperatures worsen them.
Inspect Suspension Components and Alignment
Potholes, curb contacts, and rough road surfaces gradually knock wheel alignment out of spec and wear out rubber suspension bushings.
- Check for Vehicle Pulling: Drive on a straight, level road with no nearby traffic and briefly ease your grip on the steering wheel. If the vehicle pulls to one side, your alignment needs adjustment.
- Inspect Shock Absorbers: Look behind the wheels at the shock absorbers or strut towers. Wet, oily residue coating the shock body indicates a blown hydraulic seal, meaning the unit can no longer control spring bounce.
- Look for Uneven Tire Wear: Accelerated wear along the inside or outside tread edges points directly to misaligned geometry or worn ball joints.
Inspect Body Panels, Bumpers, and Structural Frames
Rinse your undercarriage thoroughly every spring to remove winter road salt and mud from frame rails and floor pans. Rust forms quickly in hidden frame pockets, weakening structural steel. Addressing severe body rust, loose underbody shields, or collision damage early preserves your vehicle’s structural safety, crash ratings, and factory corrosion protection.
The Value of Proactive Vehicle Preservation
Maintaining a vehicle does not require professional mechanical expertise or endless hours spent working in a garage or car collision shop. It simply requires consistency, attention to detail, and the discipline to address small issues before they snowball into major mechanical failures.
By integrating these ten straightforward maintenance tasks into your routine, you transform from a reactive owner into a proactive driver in complete control of your vehicle’s health. You will enjoy a safer, more dependable ride, avoid thousands of dollars in unnecessary bills for auto repairs, and command top dollar when it comes time to sell or trade in your car.
Pick two or three simple checks from this guide to perform this coming weekend, keep a logbook to track service dates and mileage, and build a routine that will keep your vehicle running reliably for years to come.